
Headlight Restoration
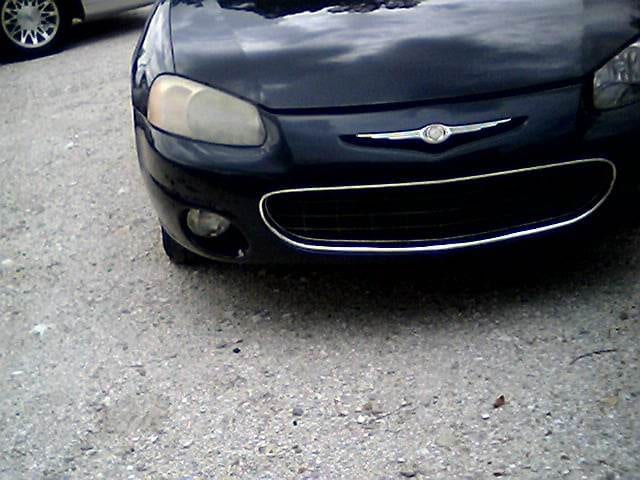
What’s the first thing you notice when driving at night? Is it the oncoming traffic lights, or is it your own? Most headlights are made of hard plastic, and over time the protective surface can start yellowing or become very dull, causing them to produce less light. However, this condition can be restored by hand with the help of some simple products and a little elbow grease.
My dad and I cleaned headlights for several years, and he put together a great step-by-step guide to remove the hazy yellowed finish that happens to most headlights over time. This headlight restoration article covers what you need to restore a headlight properly, the steps to complete the job, and how to do it cheaply. So let’s get started.
What Causes Foggy Headlights?
Many cars today are equipped with plastic headlights, which become damaged over time by different elements. Contributing factors include bug residue, road sand, sunlight, rain, snow, ice, dirt, and even salt if you live near the ocean.
So you can see how it’s easy for a headlight to go from being crystal-clear to being covered in a hazy white film over a short period of time.
Should You Buy a Headlight Restoration Kit?
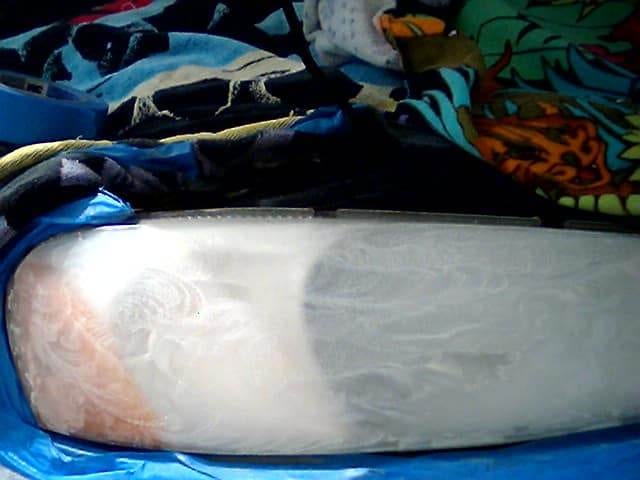
A kit is great but not always the best solution. These restoration kits contain everything needed for restoring cloudy headlights to their former glory, including special cleaners and polishes designed specifically for this purpose. However, I would like to mention that most headlight restoration kits are designed for headlights with minimal amounts of oxidation on the surface. In most cases, it’s best to buy the products mentioned in this article separately and then follow the proven process written by my dad to achieve superior results. In addition, the images in this article are vehicles he actually fixed. As you can see, the before and after photos speak for themselves.
In my opinion, dad was the best at cleaning headlights, and I consider his process the best in the nation. I spent several years performing his headlight restoration process at car washes and auto glass service centers and never had a complaint.
If you prefer to buy a kit after reading through this article, I would recommend the “Mother’s Headlight Restoration Kit.” The Mother’s kit seems to work really well, but it still doesn’t compare with the products I’ll be covering. Motor1.com has a great article on this kit.
What Supplies Are Needed to Clean Headlights?
The complete list of tools required to do the job, along with the abrasives needed, is below. The price for each item listed can vary depending on where you buy them. They can be purchased online at Amazon or offline if you prefer to shop at Walmart or a local auto parts store.
- Safety glasses
- Thin rubber or latex gloves
- Something to sit on (Preferably so you’re chest high with most headlights)
- Extension cord
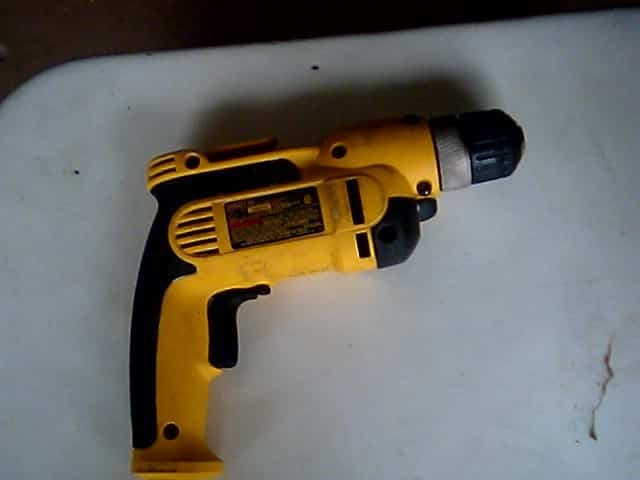
- Variable speed drill (Up to 3000 RPM)
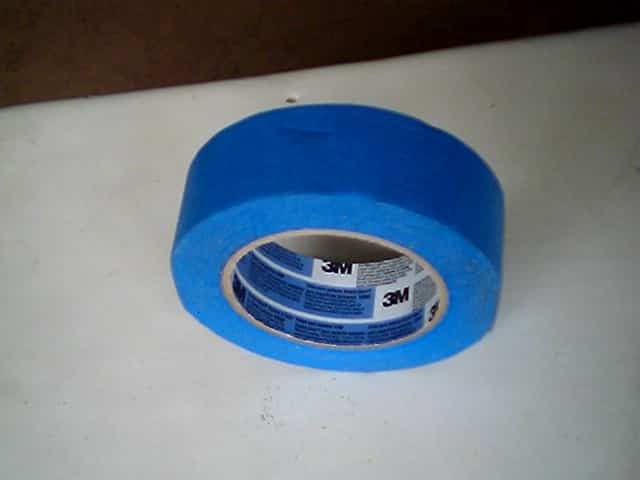
- Roll of 1″ blue painter’s tape
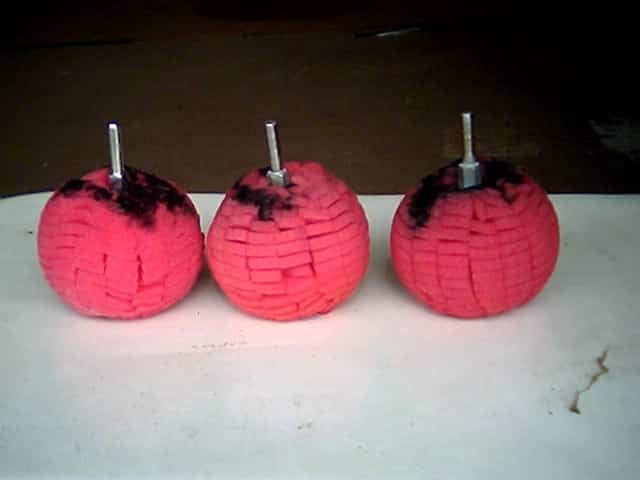
- Polishing pad or buffing ball to be used with drill
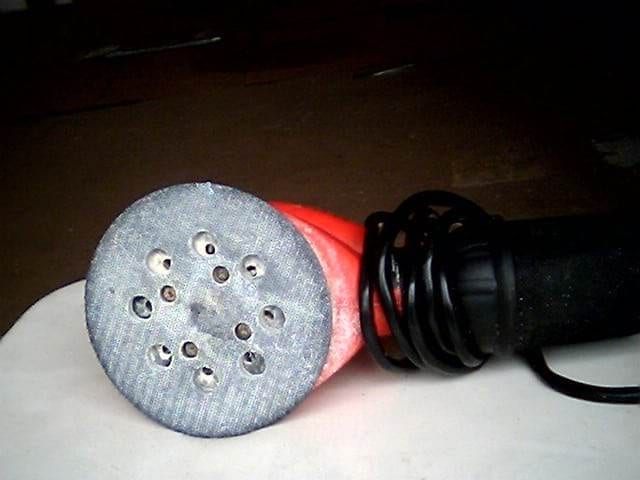
- Random orbital sander (Up to 10,000 oscillations per minute)
- 400 Grit wet/dry sandpaper that will fit your sander
- 1500 Grit wet/dry sandpaper designed for your sander
- Bottle of 3M super duty compound (This is very abrasive and does a great job removing heavy fog or oxidation)
- Bottle of Meguiar’s or equivalent polish
- Bottle of Meguiar’s or equivalent liquid automotive wax sealant
- Bottle of Purple Power Industrial strength cleaner/degreaser
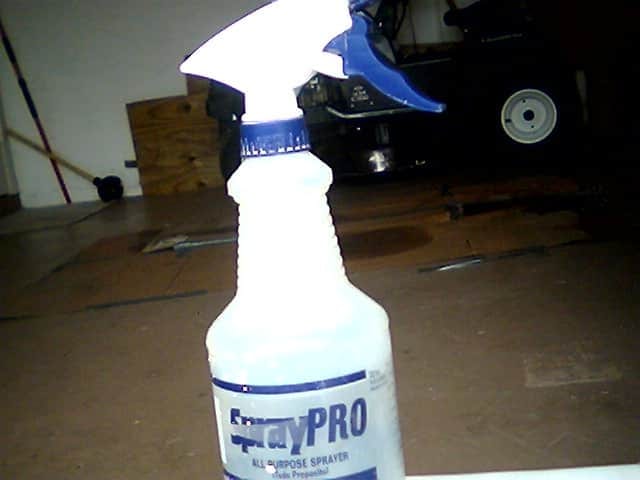
- Spray bottle for Purple Power
- Spray bottle for water
- Disposable or cleanable terrycloth, cotton, or microfiber towels.
- A shady spot to do the work. The products don’t work as well in sunlight, plus it’s hot. I found a shade tree or carport is best to block sunlight.
7 Headlight Restoration Steps To Clean Foggy Headlights Properly

Now that you know what is needed, let’s get into the preparation and process. Some of these may require multiple passes to achieve the desired result. The directions listed below were used and tested for years by my father and me and worked very well. So following these directions should help you see an improvement too.
Step One: Prepare the headlight so the surrounding areas of the lenses are protected while applying the product and performing the restoration process.
- Tape painted surfaces around the light: Masking the car will help protect the paint from abrasions if the sander or sandpaper accidentally hits it. Don’t worry; if you cause scratches in the paint, I have an article on paint scratch repair that can help.
- Open the hood: The process produces white residue around the light, and there’s less cleanup with the hood open.
- Cover the engine: Place a towel, old sheet, or blanket over the engine compartment to help prevent the white residue from splattering on the engine and causing more cleanup.
- Stage items needed: Attach 400 grit sandpaper to the orbital sander, then set out the bottles of 3M compound, polish, wax, Purple Power, and water for easy access.

Step Two: Remove the cloudy, milky, or yellow-looking layer
- Spray Purple Power on the lens (coating the entire surface) and let it sit for no more than 10 seconds. Be sure to wipe off painted surfaces immediately if you accidentally spray the paint.
- Wipe Purple Power off the lens with a cloth.
- Spray water on the lens and wipe it off with a cloth.
- If the headlight still appears yellow, repeat this step and reapply another coat of Purple Power.

Step Three: Sand off all corrosion that is built up on the lenses
- Saturate the headlight surface with water, then add water to the 400 grit sandpaper you’ll be using.
- Place the sander lightly against the headlight and turn it on. Pressure is not required. Just let the sander do the work.
- Move side to side across the surface with the sander. Be sure to include the edge of the lights as needed.
- Continue sanding until it’s a solid white color. Typically 5 to 10 minutes for this to occur. Be sure to keep everything wet the entire time. Add water if needed. This part will most likely make you nervous, and the appearance can be a bit scary. You’ll probably think the headlight is definitely destroyed, and there’s no fixing it at this point, but don’t give up yet.
- Stop sanding, apply Purple Power again, and then wipe it off with a cloth.
- Spray with water and wipe it dry with a clean cloth.
Step Four: Sanding for better clarity
- Remove 400 grit from the sander and replace it with 1500 grit.
- Spray (soak) the surface of the light and the sandpaper.
- Place the sander lightly against the headlight and turn it on. Again, no pressure is required. Simply let the sander do the work.
- Move side to side as you did in step three.
- Continue sanding until it appears clear. This can take between 5 and 10 minutes. As in step three, you’ll need to keep everything wet for the entire 5 to 10 minutes.
- Set the sander aside and re-apply another coat of Purple Power, then wipe it off with a cloth.
- Spray the surface with water and wipe it off with a cloth.
- The headlight will most likely appear a little hazy at this point, but this is okay. These are the fine lines produced by the sandpaper, which we will correct in the next step.

Step Five: Remove the sandpaper lines from the headlight.
- Attach the buffing/polishing ball to the drill
- Place a small amount of 3M super-duty compound on the tip of the ball. I typically make a small “X” with the compound on several different areas of the lens too.
- Once applied, rub the compound around with the ball, then turn on the drill.
- Move the ball side to side, plus up and down. As with sanding, it’s not necessary to apply pressure. Let the ball and speed of the drill do the work.
- After rubbing for about 5 to 10 minutes, you should notice the headlight turning clear.
- Stop buffing when the lens is clear.
- Spray with Purple Power again and wipe off with a cloth.
- Spray with water to rinse, then wipe off with a cloth.

Step Six: Shine or polish the headlight (This is where the magic happens)
- Replace the buffing ball with the polishing ball.
- Apply a small amount of polish to the ball and headlight.
- Polish the lens using the same motion as you did in step five.
- After 5 to 10 minutes, the headlight lens should appear totally clear and look new again.
- Wipe the lens with a soft dry cloth.

Step Seven: Protect the headlight with wax
- Replace the polishing ball with the wax applicator ball.
- Apply wax sealant to the ball and headlight.
- Wax the lens using the same motion as you did in step six.
- In about 5 minutes or less, you should have a super clear headlight and be finished with the process.

Maintenance: The headlights will need to be cleaned and waxed quarterly to prevent them from returning to a milky white haze. Simply wash the light, then apply a little amount of wax and wipe clean. Repeat the maintenance process every 2 or 3 months if you want to save money and avoid replacing an expensive headlamp.


